Monday, December 3, 2012

Bourbon Pecan Butterscotch Pie + Cookbook Review: Guilty Pleasures


A few months ago, I wrote a review for Hall of Fame of Southern Recipes from Mississippi’s Quail Ridge Press. I’m now reviewing one of their latest cookbooks, Recipe Hall of Fame: Guilty Pleasures, a pretty comprehensive cookbook of decadent sweet treats.

My main gripes with many dessert cookbooks are that they’re either lacking in variety (I don’t need a lengthy tome devoted merely to cakes, cookies, or even the trendy cupcake) or that the recipes are far too simplistic. I’ll never forget the occasion when my grandmother submitted her recipe for Butterscotch Pudding for a local cookbook: 1 box of Jell-O Pudding Mix, 2 cups of milk. Bless her heart, my grandmother was NOT a cook.

Guilty Pleasures, however, truly has it all. Not only does it include the usual staples of cakes, cookies, pies, and so on, but it also features a chapter devoted to easy recipes incorporating cake mixes as well as a chapter of breakfast sweets. My personal favorite, of course, is the chapter devoted to cheesecakes – yes, a chapter of cheesecakes. How titillating does that sound? 


One aspect that I especially appreciate is that while the book presents many of the classics, such as Chocolate Cake, Chocolate Chip Cookies, Pecan Pie, and so on, it also presents many updated classics-with-a-twist, like Eggnog Pound Cake, White Peach and Raspberry Cobbler, Chippy Peanut Butter Cookies (which peanut butter AND butterscotch chips!), and Amaretto Cheesecake (which I will definitely be making at some point in the future).

Better yet, my very dear friend Emily is responsible for many of the book’s gorgeous photos, including the front cover!

If you or a family member possesses an undeniable sweet tooth, you definitely should clear some space on the shelf for this book. It’s also a great cookbook for holiday planning (my mom and I looked through it several times for ideas for Christmas treats), and as cliché as this may sound, it really would be an ideal holiday gift for anyone at nearly any level of culinary expertise.

When I performed my initial survey of the book, one recipe in particular stood out to me: Bourbon Pecan Butterscotch Pie. Now, you’ve heard me extol the virtues of baking with bourbon in some of my previous entries, and last year at Christmas, I made two Bourbon Pecan Pies that were ridiculously delicious. So when I first spotted this particular recipe, I was immediately intrigued.

The pie is very easy to assemble and is out of the oven in less than an hour. As for the flavor, the butterscotch isn’t as overwhelming as you might expect. Instead, it’s rather subtle, offering a warm, buttery compliment to the pecans. An editor’s note for the recipe suggested reducing the amount of sugar for a less-sweet pie, but surprisingly, I didn’t find the pie too sweet at all. It’s a delicious balance of all the buttery, caramel-y flavors, and the faint bite of the bourbon adds a bit of charm to this homey dish. So, in summation, this pie is freakin’ awesome!


Bourbon Pecan Butterscotch Pie
(From Recipe Hall of Fame: Guilty Pleasures by Gwen McKee and Barbara Moseley – Published by Quail Ridge Press in Brandon, MS)

9-inch unbaked pie shell*
2/3 cup butterscotch chips
3 eggs
1/2 cup sour cream
1/2 cup dark corn syrup*
1 cup sugar
1/8 tsp. salt
1 tsp. vanilla
2 oz. bourbon*
1 3/4 cups pecans

*Personally, I dislike frozen pie shells, because I find that they tend to break rather easily. I much prefer the refrigerated pie crusts that you can unroll and place in your own pie dish. However, use what you prefer!

*I used light corn syrup as it was what I had on hand, and it was absolutely sufficient.

*My bourbon of choice for this recipe was Four Roses Single Barrel.

Preheat oven to 400 degrees. Cover bottom of pie shell with butterscotch chips. In a medium-size mixing bowl, combine eggs, sour cream, corn syrup, sugar, salt, vanilla, and bourbon. Mix well to blend ingredients, until mixture is smooth. Add pecans. Pour into the pie shell with chips. Place in oven, and immediately turn down temperature to 350 degrees. Bake for 50 minutes or until firm, and a knife comes out clean when inserted in the center. Serves 8.

Editor’s Note: If using extra large or jumbo eggs, use a 10-inch pie plate. If a less sweet pie is desired, sugar may be reduced to 3/4 cup.


(Notice the enticing glow emanating from the pie. That's how good it is.)

Enjoy!


Thursday, November 29, 2012

Sausage, Turkey, & Butternut Squash Pizza

You may (or may not) remember an entry I composed back in July for Pimento Cheese & Sausage Pizza. Well, I certainly could not let autumn draw to a close without posting my favorite pizza recipe, using one of my favorite autumnal ingredients, butternut squash -- Have I mentioned that I love butternut squash before? Maybe eight or ten times? Just checking.

I have made my Sausage & Butternut Squash Pizza every fall for the past few years, and it still remains my top pick out of all the pizzas I make. Come to think of it, since I did the Pimento Cheese one for summer, and now this one for fall, should I create a pizza for every month...? I will contemplate it. Anyway, I digress. I think the reason I love this dish so much is because it's very rich, hearty, and rustic, which makes it perfect for an autumn evening... or a winter evening... or a spring evening... (You see where this is going.) The flavors of the savory sausage and cheese complemented by the sweetness of the squash with just a slight essence of garlic all merge together for a unique and dazzling flavor profile that I find myself craving many times throughout the year. 

This year, however, I gave it a bit of a twist. When I left home after Thanksgiving, my mom sent the leftover turkey with me. We were lucky to have the most incredible smoked turkey breast this year, and I did a good bit of damage to it before the holiday had concluded. Regardless, nearly half of the turkey remained, and I've been wracking my brain for the past few days to try to determine the best method of consuming the leftovers. I had been in the mood for this pizza, and so I figured that surely the turkey wouldn't harm the flavor profile TOO terribly. In actuality, the pulled smoked turkey was a delicious compliment to the dish! So if you're ever stuck with leftover turkey and cannot pass another turkey sandwich without gagging, try a pizza -- seriously, it's good. 


Sausage & Butternut Squash Pizza (with Smoked Turkey, this time...) 

First, you'll need to begin with roasting the butternut squash, as this step is the most time-consuming. 

Roasted Butternut Squash

1 butternut squash, peeled and seeded
2 tbs. olive oil
1 tsp. salt
1 tsp. pepper
1 tsp. curry powder*

*I love the flavor of curry paired with butternut squash, but if you're not an enthusiast, just leave it out. 

Preheat oven to 350 degrees. Cut the squash into 1" cubes. In a bowl or on a baking sheet, coat the squash with the olive oil and seasonings, and stir together until all of the squash is evenly coated. Spread the squash cubes out in an even layer on a baking sheet and roast in the oven for 30 minutes or until the squash has become fork-tender. Remove from the oven and reserve.
 

For the crust, you are free to implement the store-bought variety, but if you'd rather impress your buddies or feel like summoning your inner Martha Stewart, here is the pizza crust recipe I provided in my last pizza post:

Quick & Easy Pizza Crust 
1 .25 oz. packet of active dry yeast
1 tsp. sugar
1 cup warm water
2 1/2 cups bread flour*
2 tbs. olive oil
1 tsp. salt 
*Sorry guys, but you really have to use bread flour (not all-purpose) for this recipe.
Combine the yeast, sugar, and warm water in a bowl, and stir until the dry ingredients have dissolved. Let stand for 10 minutes. 
Combine the flour, salt, and oil in a separate bowl, and then add the liquid mixture, and blend together until a smooth dough forms. Let the dough rest for 5 minutes. After it has rested, spread the dough out on a greased baking sheet. 
 
 
The next step is making the garlic oil. If you'd rather buy garlic oil from the grocery store, it will work perfectly, but I find that it's much more economical to make my own. 
 
Garlic Oil
 
2 cloves garlic
1/4 cup olive oil 
 
Peel the garlic cloves and smash them with the side of a knife. Add olive oil to a small pan and bring to medium heat. Add the garlic cloves, and allow them to simmer in the oil for a few minutes until they begin to slightly brown. Remove the pan from the heat and discard the garlic. Allow the oil to cool and reserve.
 
(WARNING: Brilliant me once tried to be clever and make my own garlic oil by smashing a couple of cloves of garlic, placing them in a jar of oil, and leaving it to sit for a few days -- until I was informed that I was concocting a lovely batch of botulism. Do not make the same mistake I made!)


Now we can begin to assemble the pizza! 

1 lb. ground sausage, cooked* 
2 cups shredded mozzarella cheese*
Reserved butternut squash
Reserved garlic oil
Pizza crust
(Any additional toppings you would like) 
 
*I didn't include a "Let's cook the sausage!" step because, well, you just take sausage and you cook it. I do however, insist you must cook the sausage before adding it to the pizza, as the baking time is not sufficient enough to thoroughly cook it. 
 
*I prefer mozzarella for this recipe, but you can use whatever cheese you like. Swiss or Gruyere would be delicious! 
 
Preheat oven to 400 degrees. Pour 2-3 tbs. of the garlic oil on top of the crust and brush it over the entirety of the crust's surface until it is thoroughly coated. Reserve the remaining oil for later use.  

Spread the cooked sausage in an even layer over the crust, then spread the cheese in an even layer over the sausage. Add the butternut squash (and/or additional toppings) as desired, and reserve the remaining squash for later use.
 
Bake the pizza for around 10-15 minutes or until the edge of the crust has browned and the cheese has melted. Allow the pizza to cool for at least 5 minutes, cut, and serve. 


(I'm also particularly fond of this pizza because it matches my plates!)

Enjoy!


Saturday, November 17, 2012

Old-Fashioned Lemon Squares

For some odd reason, one night earlier this week, as I was lying in bed, I suddenly found myself with an insatiable craving for lemon squares. I say "odd" because I normally don't make these delicate treats very often, and because I usually prefer lemon meringue pie. While it was far too late to embark on a culinary adventure that evening (considering I had to be at work the next day), I vowed that once I was able to secure a bit of free time, I would make a batch of lemon squares at some point during the week -- which happened to be last night. 

I realize that this will be my third blog entry where I reference The Back in the Day Bakery Cookbook by Cheryl and Griffith Day, and I want to assure you, I am in no way receiving any sort of monetary compensation for this... unfortunately... However, after perusing a few cookbooks, I found their recipe for "Sunny Lemon Bars" to be most suitable to my taste at that particular moment. 

I had to alter the recipe a bit to accommodate what ingredients were in my possession, but the end result is nothing short of magnificent: a delicious filling that is neither too sweet or too tart with a hearty shortbread crust. 

While sharing a recipe for lemon squares in mid-November might be considered odd, as this treat is usually reserved for the spring and summer months, I'm a staunch advocate of preparing whatever you want whenever you want -- and to hell with anyone who says differently. Also, I attached the handle "Old-Fashioned" to the title of the recipe because 1) I believe that food ultimately tastes better when infused with a bit of nostalgia, and 2) if I had to imagine a true representation of the lemon squares of yore, I believe this recipe produces an ideal facsimile. 

Finally, I must insist (as I've done before) that it is imperative to use fresh lemons. Fresh lemon juice is far less acidic than the concentrated juice, creating an overall more pleasant flavor. Also, for any recipe that incorporates lemon juice, adding a bit of fresh lemon zest will aid in enhancing the flavor (and besides, if you already have the lemons, you may as well zest 'em). 


Old-Fashioned Lemon Squares 

Crust: 

2 sticks of butter, melted
1/2 cup granulated sugar
1 tsp. vanilla extract
1 tsp. salt
2 cups all-purpose flour

Preheat oven to 350 degrees. Add all ingredients to a mixing bowl, and stir until they are blended and form a thick dough. Press the dough evenly into a greased large, rectangular baking dish. Bake for around 15-20 minutes, or until the crust becomes a golden brown color. Remove from the oven and reserve. Reduce heat to 300 degrees.

 Filling:
The juice and zest of 3 large lemons (around 3/4 cup juice and 3 tsp. zest)
2 cups sugar
6 eggs
6 tbs. all-purpose flour 

In a mixing bowl, whisk all ingredients together until they are thoroughly combined. Pour the mixture over the crust and bake for around 25 minutes or until the filling has set firmly. Remove from the oven and cool. 

Once cooled, dust the top with confectioner's sugar if desired. Then cut and serve the squares as you wish. 


(I honestly cannot believe how gorgeous these squares turned out to be! Unfortunately for the squares, though, they are not too pretty to eat...)
 
Enjoy!


Saturday, November 10, 2012

Sweet Potato & Guinness Shepherd's Pie

After attending the Sweet Potato Festival in Vardaman, MS last weekend, my mom brought home a 40 lb. box of sweet potatoes -- and if you aren't aware, that's a lot of damn sweet potatoes. Needless to say, I was able to procure a few of them for myself. I'd been debating how I wanted to prepare them, and for once, I was purely stumped. However, when I woke up this morning, the proverbial light blub illuminated.

When I was in Orlando last month, my friend Steven and I ate at a fantastic Irish pub-style restaurant in Downtown Disney called Raglan Road. (As a side note, the adjacent bar, Cooke's of Dublin, is also quite excellent, especially if Rob, a very charming Scotsman, is your bartender.) At the restaurant, I opted for the Fish & Chips (which were excellent), and Steven opted for the Shepherd's Pie. We tried a bit of each other's entrees, and I was utterly blown away by the Shepherd's Pie. One of the star ingredients of the dish was a house-made Guinness glaze (which they also serve with bread and olive oil as an appetizer). I vowed then and there to learn how to replicate these delicious wonders once I returned home. But until now, I'd become sidetracked in my quest.

I've seen Shepherd's Pies prepared with sweet potato topping, diverting from the original recipe, and I imagined that the flavor would pair beautifully with the rich sweetness of the Guinness glaze. I am proud to say that I was correct in my assumption. This is a perfect dish for a chilly autumn evening -- or any time, really. It's freakin' good.


Sweet Potato & Guinness Shepherd's Pie

Part I: Mashed Sweet Potatoes

Peel 4 medium sweet potatoes, and chop them into 1" cubes. Then, boil the potatoes on medium-high heat until they are fork-tender (about 10-15 minutes). Drain the water from the boiler, and add 1/2 stick of butter to the potatoes. Beat or whip the potatoes until they are smooth. Salt and pepper to taste. Reserve.

Part II: Guinness Glaze

In a boiler, bring a 12 oz. can or bottle of Guinness and 1/2 cup of brown sugar to a simmer (at about low-medium or medium heat). Allow the glaze mixture to simmer for around 30 minutes or until the mixture has reduced by half. Reserve.

Part III: Meat & Veggies

2 lbs. ground chuck
1 lb. ground sausage with sage
2 tbs. olive oil
2 carrots, peeled and chopped
1 large onion, chopped
3 cloves garlic, minced
1 tsp. rosemary (dried)
1 tsp. thyme (dried)
1 tsp. parsley (dried)
1 tbs. Worcestershire sauce
1 tsp. salt
1 tsp. pepper
Reserved Guinness glaze

In a large heavy-bottomed pot, bring the olive oil to medium-high heat, and add the carrots, onion, garlic, and herbs. Sautee the mixture for 10 minutes or until the vegetables start to become tender. Add the ground meat, Worcestershire sauce, salt, and pepper. Continue to cook the mixture for about 10-15 more minutes or until the meat is completely and evenly browned. Make sure to continually stir the mixture vigorously to ensure that all the meat browns and that none of it burns.

Once the meat is browned, drain the excess fat from the mixture, and return the meat and vegetables to the pot. Add about 3/4 cup of the Guinness glaze to the mixture (or more, if you would prefer a sweeter dish). Mix thoroughly. 

Part IV: Assembling the "Pie"

Preheat the oven to 350 degrees. Pour the meat and vegetable mixture into a large casserole dish. Then, top the mixture with the reserved mashed sweet potatoes. Make sure the potatoes are spread evenly on top of the mixture.

Bake the "pie" for about 15-20 minutes, or until the sweet potato topping has darkened a bit. Allow to cool for 5 minutes, and serve.


(The glorious fusion of Irish and Southern cookery!)


(An individual serving -- It might not look too pretty, but man oh man, this is some seriously good eats.)

Enjoy!


Saturday, October 20, 2012

Beer-Braised Barbecue Beef Nachos


I concocted this recipe on a whim after craving barbecue nachos, which has been a recent culinary trend in restaurants across the South. However, after tasting them, I'm rather partial to my homemade version.

Beer Braised Barbecue Beef

1-1  ½ lb. beef roast*
Salt & pepper
1 tbs. olive oil
2 12 oz. bottles of beer*
½ cup barbecue sauce
1 tbs. garlic powder
2 tsp. Worcestershire sauce
1 tsp. hot sauce
½ tsp. Liquid Smoke

*I used a London broil, as it’s one of the cheaper cuts of meat. Since the braising process is what will ultimately tenderize the meat, just use whatever cut you’d like.

*When choosing a beer for braising, the best option is to go for something full-bodied, like a stout. Just make sure the beer’s flavor is palatable; you don’t want something too strong, nor do you want a cheap beer that tastes like dirty water. For this recipe, I used Killian’s, because it’s what I had on hand, and it worked beautifully.

Season the roast liberally with salt and pepper on both sides. Add the olive oil to a heavy-bottomed pot, and bring to high heat. Allow the roast to sear (on both sides) in the pot until it has thoroughly browned.

Reduce the heat to medium, and add the barbecue, Worcestershire, and hot sauces, garlic powder, Liquid Smoke, and one bottle of beer. Cover the pot, and allow the roast to braise for 2 hours. Make sure to turn the meat every so often so that it doesn’t burn on the bottom.

After the initial 2-hour braising period, remove the meat from the pot, and slice it. Return it to the pot, and add the remaining bottle of beer. Allow the meat to cook for 30 minutes or until it easily pulls apart.

At this point, you’ll want to gently “pull” the meat with a fork for easy distribution over the nachos. Also, you may want to use the reduced braising liquid as a sauce for the nachos – it’s pretty delicious!


For assembling the nachos, you will need:

Tortilla chips
Pulled beef
White queso dip*
Sliced jalapenos
Chopped tomatoes
Barbecue sauce
(And any other ingredient you’d like – This would be fantastic with some sliced avocado or chopped onion!)

*Some people prefer to make their own queso dip. However, the store-bought variety suits me well enough. If you don’t have queso dip on hand, you can use whatever kind of cheese you prefer.

Here’s how I usually make my nachos: Preheat the oven to 350 degrees. Assemble all the ingredients on a baking sheet or baking dish. Make sure to layer the ingredients so that you are able to get a bit of the “good stuff” on each tortilla chip. Allow the nachos to bake for 5-10 minutes, and then enjoy! 


(Dreams can come true...)


Friday, October 19, 2012

Butternut Squash "Mac 'n' Cheese"


One of my favorite fruits of the fall season is butternut squash. Truthfully, I prefer it to pumpkin – blasphemy, I know. I just think that butternut squash possesses a richer flavor, and I enjoy its natural sweetness. Also, preparing butternut squash is a hell of a lot less arduous than dealing with a pumpkin.

Like pumpkin, butternut squash is also incredibly versatile. My mom used to prepare delicious butternut squash pies when I was growing up (think: somewhat of a cross between pumpkin and sweet potato pie). As I became older, I began to notice that butternut squash being implemented in many savory dishes as well as sweet.

My first attempt at preparing this autumnal edible was a few years ago when I made a delicious butternut squash soup, which has now become a fall-and-winter ritual for me. Over time, I’ve implemented this fantastic ingredient into a number of dishes, including cheesecake and pizza. However, I think my favorite butternut squash recipe has to be my Butternut Squash “Mac ‘n’ Cheese.”

…And yes, the quotation marks do serve a purpose. You see, this recipe isn’t necessarily a macaroni and cheese dish in the traditional sense. However, you’ve got pasta, and you’ve got cheese, so why not? The natural slight sweetness of the squash makes for a stunning flavor profile when paired with the sharp saltiness of the parmesan cheese. Also, this is a wonderful and hearty cold-weather dish perfect for fall or winter.


Butternut Squash “Mac ‘n’ Cheese”

1 medium-sized butternut squash
(Olive oil, salt, pepper for roasting)
1 lb. penne pasta, cooked*
2 tbs. butter
3 tbs. flour
1 tsp. salt
½ tsp. pepper
3 cloves of garlic, minced
1 tsp. Herbes de Provence*
2 cups milk
1 ½ cups grated parmesan cheese

*You can use whatever pasta you so choose for this recipe; in the past, I’ve used cavatappi and campanelle with great success. However, make sure the pasta is a hearty variety so that it will hold up well in the casserole.

*You can omit the Herbes de Provence, or substitute with other herbs if you wish. I just think they put the dish over the top.

Preheat oven to 400 degrees. Peel the butternut squash, scoop out the seeds, and cut into 1” chunks. Spread the squash onto a baking sheet, and coat liberally with olive oil, with just a dash of salt and pepper to bring out the flavor. Once the squash is evenly coated, roast in the oven for 40 minutes, or until the squash is fork-tender. Reserve.

Lower the oven temperature to 325 degrees.

In a saucepan, melt the butter on medium-high heat. Add flour, salt, pepper, garlic, and herbs, and stir the mixture until it forms a paste. Allow this paste to cook for a couple of minutes until it reaches a somewhat golden brown color. Stir in the milk, and allow the mixture too cook for 10 minutes, or until the sauce reaches a thickened consistency that will coat the back of your spoon. Remove from heat, and add 1 cup of the parmesan cheese, stirring gently.

Add the cooked butternut squash to the cream sauce. If you would prefer not having chunks of squash in the dish, you can mash them with a fork or potato-masher. Pour the sauce over the cooked pasta, and stir well. Add to a greased baking dish, and top with the remaining parmesan cheese.

Bake for 20 minutes or until the top of the casserole has slightly browned. Remove from oven, and allow to cool for five minutes. 


 (Did I forget to mention that it's also a very pretty dish? 'Cuz, yeah, it is. I'm still gonna eat it, though.)

Enjoy!

Saturday, September 29, 2012

Pumpkin Gnocchi with Sausage in a Curry Cream Sauce

Fall (my favorite season) is in the air, and it's time for something a little festive! 

Not too long ago, my roommate purchased a package of pre-made pumpkin gnocchi, and I've been wracking my brain trying to concoct a suitable recipe for this whimsical culinary creation.

OK, fine -- I realize that with this particular recipe, I'm not making everything from scratch (for once). However, when it comes to certain food items, I assert that the store-bought varieties are completely acceptable. For instance, very few people make pasta from scratch, correct? I think gnocchi fits snugly into that category. But I digress.

I adore curry in all its exotic forms. I've made Japanese-style curry for years now (made with yellow curry powder), but recently, I've branched out and experimented with other types of curry. I'm almost certain my absolute favorite is Thai green curry -- I mean, coconut milk! How could you possibly go wrong? Anyway, I always like to keep a bottle of high-quality yellow curry around, because it's the perfect ingredient for punching up a boring recipe. Not to mention, the warm spices are an excellent complement to most autumnal dishes, as it pairs well with most types of squash, especially the sweeter varieties, such as butternut. 

Therefore, pumpkin + curry = match made in heaven. Then, I decided to throw a little sausage into the mix, just for the fun of it all. Now smoked sausage and curry may seem like an odd pairing, but strangely enough, the combination works. Sausage, like ham, bacon, and other such pork products, has a naturally strong flavor that holds up well with most spices, so the curry doesn't overwhelm the flavor but instead acts as a subtle complement. 

For those of you unfamiliar with gnocchi, they are essentially Italy's version of dumplings, though instead of being made with flour, they're made with potato. In the past, I'd heard of sweet potato gnocchi (which I would like to try at some point because it sounds AMAZING), but pumpkin gnocchi was a new discovery for me. According to the packaging, the gnocchi are still made with a potato base but include a bit of pureed pumpkin. The pumpkin flavor is definitely present, though not overwhelming, making these gnocchi a fantastic fall treat. 

 If you are a purist and would like to make your own gnocchi, help yourself. I, on the other hand, will shamelessly take a shortcut here. If you have trouble locating pumpkin gnocchi, don't worry; the plain variety will be fine for this recipe. 


Pumpkin Gnocchi with Sausage in a Curry Cream Sauce 

Begin by preparing the gnocchi. Bring a pot of water to a boil, and carefully add the gnocchi. Let them cook for 2-3 minutes, and then drain. 

(You can skip this next step, but I think it enhances the texture of the gnocchi.) Then, in a skillet, melt 2 tbs. butter on medium high heat, and add the cooked gnocchi. Sautee them until they become slightly browned. Remove from the heat and reserve. 

Next, slice 1/2 lb. of smoked sausage as desired. Cook in a skillet on medium-high heat until the sausage is evenly browned. Remove from the heat and reserve. 


Curry Cream Sauce 

1 small onion, chopped
3 cloves garlic, minced
1 orange or red bell pepper, chopped
3 tbs. butter 
2 tbs. flour
1 tsp. salt
1/2 tsp. pepper
2 cups milk*
2 tsp. Madras curry powder 

*Traditionally, cream sauces are made with heavy cream. However, the thickness of the sauce truly results from the combination of the butter and flour, so I've always just used the plain old 2% that I keep around the house. 

On medium high heat, melt the butter in a saucepan. Add the onion, garlic, and bell pepper, and allow to cook for around 10 minutes or until the onions become soft and translucent. Next, stir in the flour until it is thoroughly incorporated. Add the salt and pepper. Allow the mixture to cook for another 2-3 minutes, and then add the milk and curry powder. Then allow the mixture to simmer, stirring occasionally, until it thickens (around 5-7 minutes). You will know it is done when the sauce has reached a consistency allowing it to coat the back of a spoon. 

Once the sauce reaches the desired thickness, remove from heat immediately. Combine the gnocchi, sausage, and cream sauce, and serve. 

(It's a regular sausage fest in here!)
 
Enjoy!


Friday, September 14, 2012

Reconstructing Julia: Boeuf Bourguignon


Julia Child is one of my personal heroes. She was a woman who loved her butter as much as she loved her wine, and her sage words “Don’t be afraid!” have served as a personal mantra for me both inside and outside of the kitchen.

After purchasing my copy of Mastering the Art of French Cooking, I pored over it for hours as if it were a novel. Contained within were not only spectacular French recipes but also a bountiful assortment of kitchen tips to help demystify some of the more complex culinary techniques. I insist unrelentingly that every home kitchen should have a copy of this cookbook somewhere in reaching distance. Whether or not you’re a fan of French cuisine, you will find this book a veritable fount of culinary wisdom.

Julia’s most famous recipe has been the much lauded French classic, Boeuf Bourguignon. For those of you who are unfamiliar with it, think of it as a “fancified” beef stew. However, I feel that simplistic a description doesn’t quite do it justice. Quite frankly, it’s one of the best, most fulfilling dishes I’ve ever eaten. Beef, bacon, wine… Are you salivating yet?

However, when it comes to preparing Boeuf Bourguignon at home, there is an unavoidable problem that must be confronted: it’s a major pain in the ass to make. The prep-work is arduous and time-consuming, and there are so many steps and techniques involved, an amateur home cook will likely go mad in his first attempt at recreating this dish. That’s not to imply that the finished product isn’t worth the trouble – because seriously, once you taste it, you will no longer care about how labor-intensive it is. Still, the time and effort involved will likely still have you feeling antsy about attempting to make this recipe.

Having prepared Julia’s Boeuf Bourguignon several times, I’ve found a few shortcuts here and there to help alleviate a bit of the burden. I’m nowhere near as narcissistic to believe that my recipe is in any way superior to the Master’s. I mean, how can you improve upon perfection? However, if you are intimidated by this recipe, I’d like to think that my version is slightly less unnerving.

In this recipe (and whenever I’m running short on patience), I skipped the searing process for the beef. While searing is always preferable, allowing the meat to develop a crust which enhances the overall texture of the dish, I don’t necessarily find it a crucial part of the process. I’ll leave the decision of searing up to you.

In regards to the actual consumption of your Boeuf Bourguignon, Julia recommends serving the stew over a bed of hot, buttered egg noodles or boiled potatoes. Having tried both, I must honestly say that the egg noodles win by a landslide. I realize that this seems like an odd pairing – beef stew and noodles? However, something about this combination makes for pure edible perfection.


Tyler’s Somewhat-Simplified Boeuf Bourguignon

2-3 lbs. lean beef, cut for stewing
6 oz. bacon, chopped
1 tbs. olive oil
1 carrot, chopped
1 onion, chopped
1 tsp. salt
1 tsp. pepper
2 tbs. flour
3 cups red wine*
2 cups beef stock or broth
1 tbs. tomato paste
2 cloves of garlic, chopped
½ tsp. dried thyme
1 bay leaf
½ lb. sliced mushrooms
Braised pearl onions (see auxiliary recipe below)

*When it comes to the wine, you’ll want to go for something dry, because if the wine is too sweet, the dish will just taste odd. I’ve used both Cabernet Sauvignon and Pinot Noir before, and the finished product was impeccable.

In heavy-bottomed pot (I recommend an enamel-coated dutch oven), add the bacon and olive oil and bring to medium-high heat. Once the bacon is thoroughly browned, remove it from the pot and place it on a plate covered with paper towels to absorb the excess fat. Add the carrot and onion to the pot and allow them to cook in the oil and bacon fat until tender.

Preheat the oven to 450 degrees. Add the beef and cooked bacon to the pot with the vegetables. Add the salt, pepper, and flour, and stir the meat and vegetables until they are thoroughly coated. Place the pot in the oven and allow the meat and vegetables to cook for four minutes or until the beef begins to brown. Stir the ingredients again, and return the pot to the oven for four more minutes, or until the meat is browned.

Lower the oven temperature to 325 degrees. Return the pot to the stove, and add the wine, stock or broth, tomato paste, garlic, and herbs. Bring to a simmer and then return the pot, covered, to the oven. Allow the stew to simmer for 2-3 hours or until the beef is fork-tender. You may want to uncover it at some point during the cooking process to allow the liquid to reduce a bit.

Add the mushrooms and braised pearl onions to the pot, and allow the stew to cook for at least five more minutes. Once the mushrooms are cooked, remove the pot from the oven and skim the fat off the top of the stew with a spoon. Serve the stew over a bed of warm, buttered egg noodles.


Braised Pearl Onions
(You can omit these if you want, but they are part of Julia’s original recipe, and I adore them!)

12 oz. package of frozen pearl onions
3 tbs. butter
½ cup of beef stock/broth or red/white wine*
¼ tsp. dried thyme

*The choice of braising liquid is entirely up to you. If you want the onions to have a meaty flavor, then go with the beef stock or broth. The wine, on the other hand, will impart a lighter, sweeter flavor.

On medium-high heat, melt the butter in an oven-safe skillet and add the onions. Allow them to cook, stirring them occasionally, until they begin to brown. Add the liquid and thyme, and place the skillet in a 325 degree oven. Allow the onions to cook for around 15-20 minutes or until the onions are browned and the braising liquid has been absorbed. 


(God Bless Julia Child.)
Bon appetit!


Thursday, September 13, 2012

Bourbon Sweet Potato Tart

I had sweet potatoes -- they were on sale. I had top-shelf bourbon -- I had gotten it at a 50% off discount. So what would be the next logical step? Dessert, of course. 

Sweet potato pie was a staple in my household growing up. My mom made them constantly, and they were always incredible. Another reason I adore sweet potato pie is because it's a relatively inexpensive dessert (using only sweet potatoes, sugar, pie crust, eggs, sometimes milk), it's virtually fail-proof, and it's always a crowd-pleaser. 

I mentioned this a few entries ago, but I love adding bourbon to desserts. Its natural sweetness complements the flavor of most sweet treats, and it gives a subtle kick that enhances the overall taste. You've probably seen recipes for Bourbon Pecan Pie before, but the flavor of bourbon pairs surprisingly well with sweet potato!

A few Christmases ago, I received a tart pan as a gift -- and I've used the hell out of it. I really enjoy tart pans because they're great for "dressing up" an ordinary pie or pie-like edible. I've used mine to make quiche on several occasions. I just think that tarts are so elegant and sophisticated-looking. Also, seriously, how impressed will your friends be if you tell them you made a "tart"? Nobody makes those anymore!

Now, if you don't have a tart pan, you can just use a regular pie pan. Don't sweat it. 


Bourbon Sweet Potato Tart

1 large sweet potato (or 2 small ones) 
1 refrigerated pie crust*
3/4 cup sugar
2 eggs
1-2 tbs. bourbon*

*As I said in my last entry, if you like to make your crust from scratch, go right ahead, and kudos to you! I, on the other hand, prefer the quick and easy route when it comes to pastries.

*You can add bourbon to taste. A healthy tablespoon will do ya, but two will do ya even better. If you'd rather exclude this ingredient, a teaspoon of vanilla or a tablespoon of maple syrup would be worthwhile substitutes. 

Preheat oven to 350 degrees. Place your sweet potato, whole and unpeeled, on a baking sheet, and allow it to roast in the oven for 30 minutes or until it becomes soft to the touch -- obviously, please don't test its softness with a bare hand. Remove from the oven, allow it to cool, and peel away the skin. Reserve.

Keep your oven temperature at 350 degrees. Roll out the refrigerated pie crust and gently place it in the tart pan, pressing it into place. Remove the excess crust and discard. 

In a mixing bowl, combine the sweet potato, sugar, eggs, and bourbon, and mix until all ingredients are blended thoroughly. If you find yourself with "stringy bits" from the sweet potato, try pureeing the mixture (in a blender or with a hand-blender). Once the mixture reaches an even consistency, pour it into the prepared tart shell/pie crust and bake for 30-40 minutes, or until the mixture is set and crust becomes golden brown.

Remove from the oven and allow it to cool for at least 30 minutes. Serve. 

(As the Brits would say, "That's one lusty tart!" Only in their case, they're probably not talking about pastries.)
 
Enjoy!


Monday, September 10, 2012

Pastry-Wrapped Salmon with Herbes de Provence

Salmon is probably my favorite fish. I just love its texture and unique flavor profile. I even love it raw. Seriously, give me some smoked salmon and cream cheese on a bagel with capers and thinly-sliced tomatoes and onions, and I'm in heaven. 

With that in mind, this recipe is one of my absolute favorites. I concocted it one evening a while back when I was feeling rather experimental. Salmon + Pastry? That's a perfect duo in my book. Needless to say, it was an instant winner.

Another great aspect of this dish is that it looks and sounds very complicated, but it's actually incredibly easy to throw together, even for culinary amateurs. If you ever want to impress your guests at a dinner party, this recipe is the way to go. 

I used to call this recipe "Salmon Provencal" because of the inclusion of Herbes de Provence until I realized that there is an actual dish called "Salmon Provencal" that is completely different from my concoction. I have been known to refer to this dish as "Fishy Puff" on occasion, but "Pastry-Wrapped Salmon with Herbes de Provence" sounds so much more sophisticated and cosmopolitan, doesn't it? 


Pastry-Wrapped Salmon with Herbes de Provence

1 skinless salmon filet* (Somewhere between .7 lb-1 lb) 
1 store-bought refrigerated pie crust*
1/2 cup olive-oil based mayonnaise*
1 tbs. dijon mustard
1 tsp. Herbes de Provence
1/4 tsp. garlic powder
1/4 tsp. salt
1/4 tsp. pepper

*If your salmon filet still has the skin in tact, make sure to remove it. Usually, it peels off somewhat easily. 

*I originally made this recipe using puff pastry, but regular old pie crust is just as delicious. However, both puff pastry and phyllo dough are excellent with this recipe. If you are a pastry whiz and want to make your own dough, go for it. I, on the other hand, hate making pie dough, so the store-bought variety suits me just fine. 

*You can use whatever kind of mayonnaise you like, but I promise, this is so much better with the olive-oil based variety. If you don't like mayo, just double up on the dijon mustard. 

Preheat oven to 350 degrees. Prepare a well-greased baking sheet. 

In a bowl, combine the mayonnaise, mustard, and seasonings thoroughly until they are mixed evenly. 

Unroll the pie crust and place your salmon filet to one side of it. Then spread the mayo-mustard mixture evenly over the fish, forming an even layer. If you have excess (which is likely, just discard it). Then wrap the fish in the pie crust and seal the edges. Place it on the baking sheet and brush the crust with a bit of melted butter for a browner, prettier crust. 

Bake for 30 minutes or until the crust is golden brown. Allow the fish to cool for 5-10 minutes and then serve. 

(Pastry-wrapped love.)

 As far as side dishes go, this pairs well with a light salad or roasted vegetables. Also, don't forget the wine! Enjoy! 


Saturday, September 8, 2012

Impromptu Late-Night Post: The Best Dang Chicken Fingers Ever

I wasn't planning on composing a new blog entry tonight, but I flung a craving for chicken fingers earlier and decided to indulge myself. 

I won't wax poetic on the virtues of homemade chicken fingers as opposed to the fast food variety, but in all honesty, the homemade version is ultimately victorious in any sort of comparison. 

This recipe was inspired by Hilah Johnson whose cooking blog and videos are a never-ending source of amusement and inspiration for me. I took her recipe for a fried chicken sandwich and metamorphosed it into my own recipe for chicken fingers. Regardless of whichever one you try, both recipes are definite winners! 


The Best Dang Chicken Fingers Ever 

2 boneless, skinless chicken breasts
1 cup dill pickle juice*
1 egg
1 tsp. hot sauce
1 1/2 cups all-purpose flour
1 tsp. celery salt
1 tsp. basil
1 tsp. black pepper
Canola oil 

*Sounds weird, right? I know. But trust me, the pickle juice serves as an excellent "quick brine."

Cut the chicken breasts into strips. Marinate them in the pickle juice for at least 30 minutes. 

In a bowl, beat the egg and hot sauce together until evenly mixed. In a different bowl, combine the flour and seasonings.

In a heavy-bottomed pot or skillet, heat the canola oil (around 2 cups or so) to medium high heat. Remove the chicken strips from the pickle juice and coat them in the egg wash. Then coat them evenly in the flour mixture. Place the breaded strips, a few at a time, into the heated oil. After 2 or 3 minutes, flip the strips and allow them to fry for 2 or 3 more minutes. Continue this process until they are evenly browned on both sides. Once they are browned, remove the strips from the oil and place them on a plate with paper towels to absorb the excess grease.

Allow them to cool for at least 5 minutes and serve. 

(You won't even need a dippin' sauce! However, if you want one, I'd recommend a lovely homemade sriracha-mayonnaise or honey dijon.)

Enjoy the crispy, juicy, delicious wonder! 


Friday, August 31, 2012

The Country Trifecta: Fried Catfish, Crispy Homemade Fries, and Blackberry Cobbler

First, let me begin by deeply apologizing for my unintended hiatus. I haven't had the opportunity to update the blog in a while, as I've been caught in the "back to school" rush of a new semester. So I decided to make it up to you with a huge blog post with three calorie-laden recipes: Fried Catfish, Crispy Homemade Fries, and Blackberry Cobbler.

Fried catfish is a particularly favorite dish of mine. Growing up, it was a treat that we feasted upon only on special occasions. Admittedly, I prefer ordering fried fish of any kind at restaurants as opposed to making it at home, mainly because I hate the resulting mess from frying, but I think my homemade fish is pretty good, if I do say so myself. 

And what pairs better with fried catfish than french fries? And yet, it's another dish that is more desirable when purchased as opposed to being prepared at home, as the homemade variety tends to be soggy and floppy. However, I recently discovered the secret to homemade fries that are ACTUALLY crispy! It's a bit of a tedious process with the soaking and double-frying, but it truly does work.


Fried Catfish

Whole catfish*
Cornmeal mix* 
Salt & Pepper
Canola Oil 

*I ALWAYS prefer whole fish to filets. I find the overall flavor and texture to be much better when the fish is still on the bone. 

*You can use plain old straight-up cornmeal if you prefer, but I prefer the texture resulting from using the cornmeal "mix." 

Season the fish generously with salt and pepper. Give the fish a generous coating of cornmeal mix. I recommend re-coating the fish two or three times, just to ensure a hearty crust. 

Heat the canola oil in a heavy-bottomed frying pan until it reaches a medium-high heat. You can test the oil by dropping in a few cornmeal crumbs -- if the crumbs start to sizzle, the oil will be hot enough. Gently place the fish in the pan. If you are cooking several fish, I don't recommend cooking more than two fish at once, as the overcrowding will affect the temperature of the oil. 

Fry the fish for five minutes (ha! alliteration!) and then turn it, and cook for five more minutes. Continue this process until the fish has become a golden brown color. Place the fish on a plate with paper towels to absorb the excess grease. Cool for five minutes, and enjoy! 


Crispy Homemade Fries 

Russet potatoes
Salt 
Canola oil

Peel the potatoes and slice as desired. Place the potato cuts into a large bowl and fill with ice water. Allow them to sit for half an hour, then remove them from the water and place them on paper towels to dry. 

Heat the oil in a heavy-bottomed pot until it reaches a medium-high heat. Once the potato cuts are dry, add them to the heated oil a few at a time. Don't overcrowd the pot, as this will affect the temperature of the oil. Once the fries have reached a light golden color, remove them from the oil and place them on a plate with paper towels to absorb the excess grease. Remove the pot from the heat. 

Allow the fries to cool for five minutes, and then re-heat the oil, once again to a medium-high heat. Return the fries to the pot and cook them until they turn a light golden brown color. Remove them from the oil and place them on another plate with paper towels. Sprinkle with salt, and enjoy! 

(Southern-fried goodness -- served with ketchup, the Alabama way!)


When it comes to cobbler, there are many different varieties. The cobbler with which I grew up has more of a rich, cake-y topping as opposed to a crust (and I believe this concoction is occasionally referred to as a "buckle"). However, when I make cobbler, I tend to go for the more traditional crust -- mainly because I can never remember the flour-sugar ratio for my mom's "crust." 
My recipe may seem a bit odd, considering I add jelly to the berries. However, I promise you, the results are AMAZING. I discovered this concoction purely on accident a few years ago. I wanted to make a blackberry cobbler, and I wondered how it would taste if I incorporated some of my homemade raspberry jam. So I added the jam to the berries in lieu of sugar, and I discovered that the jam contained just enough sugar to sweeten the berries, and the flavor for the jam melded beautifully with the berries' tartness. Also, the pectin from the jelly or jam helps to thicken the filling, making for a rich and delicious cobbler. 


Tyler's Blackberry Cobbler
1 lb. blackberries, fresh or frozen
1 half-pint jar of jam/jelly/preserves*
*I've found that jam, jelly, and preserves all work well for this recipe, so use whatever is most convenient. Berry-flavored varieties obviously pair well with the blackberries, but you'd be surprised at some unusual-sounding combinations that are quite delicious. Once, in a pinch, I used apricot preserves. Also, for this particular cobbler, I used a jar of homemade vanilla pear jelly, and the results were outstanding!

Crust:
3 cups all-purpose flour
1 1/2 sticks cold butter
1 tsp. salt
1 tbs. sugar
Ice water

You'll want to prepare the crust first. In a food processor, add the flour and the butter. Blend together until the butter has fragmented into tiny pieces throughout the flour. Add the salt and sugar. Gradually add ice water, a few tablespoons at a time, and blend until the mixture becomes a workable dough. Remove the dough from the processor and mold into a disk. Wrap the dough in plastic wrap and refrigerate until thoroughly chilled. 

In a medium-sized saucepan, heat the blackberries and jelly on medium-high heat until the mixture reaches a simmer. Remove the dough from the refrigerator. 

Here's where I will digress for a moment. I'm one of those weirdos who likes dumplings in my cobbler. So what I do at this point in the cooking process is pinch a few pieces from the dough and add it to the simmering berries. 

Preheat the oven to 350 degrees. Roll the dough out until it's around 1/8"-1/4" thick. Cut to fit your oven-safe baking vessel -- you will likely have excess dough. Then, add the berry mixture to the vessel and top with the cut dough. For a pretty brown crust, you will want to pour a bit of melted butter over the top. Bake for around 45 minutes to an hour, or until the crust is golden brown. Allow to cool, and enjoy! 
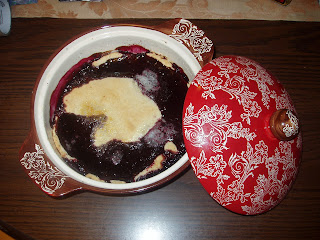
(Ta-dah! Enough to share -- but you won't want to...)

Enjoy, guys!