Saturday, September 29, 2012

Pumpkin Gnocchi with Sausage in a Curry Cream Sauce

Fall (my favorite season) is in the air, and it's time for something a little festive! 

Not too long ago, my roommate purchased a package of pre-made pumpkin gnocchi, and I've been wracking my brain trying to concoct a suitable recipe for this whimsical culinary creation.

OK, fine -- I realize that with this particular recipe, I'm not making everything from scratch (for once). However, when it comes to certain food items, I assert that the store-bought varieties are completely acceptable. For instance, very few people make pasta from scratch, correct? I think gnocchi fits snugly into that category. But I digress.

I adore curry in all its exotic forms. I've made Japanese-style curry for years now (made with yellow curry powder), but recently, I've branched out and experimented with other types of curry. I'm almost certain my absolute favorite is Thai green curry -- I mean, coconut milk! How could you possibly go wrong? Anyway, I always like to keep a bottle of high-quality yellow curry around, because it's the perfect ingredient for punching up a boring recipe. Not to mention, the warm spices are an excellent complement to most autumnal dishes, as it pairs well with most types of squash, especially the sweeter varieties, such as butternut. 

Therefore, pumpkin + curry = match made in heaven. Then, I decided to throw a little sausage into the mix, just for the fun of it all. Now smoked sausage and curry may seem like an odd pairing, but strangely enough, the combination works. Sausage, like ham, bacon, and other such pork products, has a naturally strong flavor that holds up well with most spices, so the curry doesn't overwhelm the flavor but instead acts as a subtle complement. 

For those of you unfamiliar with gnocchi, they are essentially Italy's version of dumplings, though instead of being made with flour, they're made with potato. In the past, I'd heard of sweet potato gnocchi (which I would like to try at some point because it sounds AMAZING), but pumpkin gnocchi was a new discovery for me. According to the packaging, the gnocchi are still made with a potato base but include a bit of pureed pumpkin. The pumpkin flavor is definitely present, though not overwhelming, making these gnocchi a fantastic fall treat. 

 If you are a purist and would like to make your own gnocchi, help yourself. I, on the other hand, will shamelessly take a shortcut here. If you have trouble locating pumpkin gnocchi, don't worry; the plain variety will be fine for this recipe. 


Pumpkin Gnocchi with Sausage in a Curry Cream Sauce 

Begin by preparing the gnocchi. Bring a pot of water to a boil, and carefully add the gnocchi. Let them cook for 2-3 minutes, and then drain. 

(You can skip this next step, but I think it enhances the texture of the gnocchi.) Then, in a skillet, melt 2 tbs. butter on medium high heat, and add the cooked gnocchi. Sautee them until they become slightly browned. Remove from the heat and reserve. 

Next, slice 1/2 lb. of smoked sausage as desired. Cook in a skillet on medium-high heat until the sausage is evenly browned. Remove from the heat and reserve. 


Curry Cream Sauce 

1 small onion, chopped
3 cloves garlic, minced
1 orange or red bell pepper, chopped
3 tbs. butter 
2 tbs. flour
1 tsp. salt
1/2 tsp. pepper
2 cups milk*
2 tsp. Madras curry powder 

*Traditionally, cream sauces are made with heavy cream. However, the thickness of the sauce truly results from the combination of the butter and flour, so I've always just used the plain old 2% that I keep around the house. 

On medium high heat, melt the butter in a saucepan. Add the onion, garlic, and bell pepper, and allow to cook for around 10 minutes or until the onions become soft and translucent. Next, stir in the flour until it is thoroughly incorporated. Add the salt and pepper. Allow the mixture to cook for another 2-3 minutes, and then add the milk and curry powder. Then allow the mixture to simmer, stirring occasionally, until it thickens (around 5-7 minutes). You will know it is done when the sauce has reached a consistency allowing it to coat the back of a spoon. 

Once the sauce reaches the desired thickness, remove from heat immediately. Combine the gnocchi, sausage, and cream sauce, and serve. 

(It's a regular sausage fest in here!)
 
Enjoy!


Friday, September 14, 2012

Reconstructing Julia: Boeuf Bourguignon


Julia Child is one of my personal heroes. She was a woman who loved her butter as much as she loved her wine, and her sage words “Don’t be afraid!” have served as a personal mantra for me both inside and outside of the kitchen.

After purchasing my copy of Mastering the Art of French Cooking, I pored over it for hours as if it were a novel. Contained within were not only spectacular French recipes but also a bountiful assortment of kitchen tips to help demystify some of the more complex culinary techniques. I insist unrelentingly that every home kitchen should have a copy of this cookbook somewhere in reaching distance. Whether or not you’re a fan of French cuisine, you will find this book a veritable fount of culinary wisdom.

Julia’s most famous recipe has been the much lauded French classic, Boeuf Bourguignon. For those of you who are unfamiliar with it, think of it as a “fancified” beef stew. However, I feel that simplistic a description doesn’t quite do it justice. Quite frankly, it’s one of the best, most fulfilling dishes I’ve ever eaten. Beef, bacon, wine… Are you salivating yet?

However, when it comes to preparing Boeuf Bourguignon at home, there is an unavoidable problem that must be confronted: it’s a major pain in the ass to make. The prep-work is arduous and time-consuming, and there are so many steps and techniques involved, an amateur home cook will likely go mad in his first attempt at recreating this dish. That’s not to imply that the finished product isn’t worth the trouble – because seriously, once you taste it, you will no longer care about how labor-intensive it is. Still, the time and effort involved will likely still have you feeling antsy about attempting to make this recipe.

Having prepared Julia’s Boeuf Bourguignon several times, I’ve found a few shortcuts here and there to help alleviate a bit of the burden. I’m nowhere near as narcissistic to believe that my recipe is in any way superior to the Master’s. I mean, how can you improve upon perfection? However, if you are intimidated by this recipe, I’d like to think that my version is slightly less unnerving.

In this recipe (and whenever I’m running short on patience), I skipped the searing process for the beef. While searing is always preferable, allowing the meat to develop a crust which enhances the overall texture of the dish, I don’t necessarily find it a crucial part of the process. I’ll leave the decision of searing up to you.

In regards to the actual consumption of your Boeuf Bourguignon, Julia recommends serving the stew over a bed of hot, buttered egg noodles or boiled potatoes. Having tried both, I must honestly say that the egg noodles win by a landslide. I realize that this seems like an odd pairing – beef stew and noodles? However, something about this combination makes for pure edible perfection.


Tyler’s Somewhat-Simplified Boeuf Bourguignon

2-3 lbs. lean beef, cut for stewing
6 oz. bacon, chopped
1 tbs. olive oil
1 carrot, chopped
1 onion, chopped
1 tsp. salt
1 tsp. pepper
2 tbs. flour
3 cups red wine*
2 cups beef stock or broth
1 tbs. tomato paste
2 cloves of garlic, chopped
½ tsp. dried thyme
1 bay leaf
½ lb. sliced mushrooms
Braised pearl onions (see auxiliary recipe below)

*When it comes to the wine, you’ll want to go for something dry, because if the wine is too sweet, the dish will just taste odd. I’ve used both Cabernet Sauvignon and Pinot Noir before, and the finished product was impeccable.

In heavy-bottomed pot (I recommend an enamel-coated dutch oven), add the bacon and olive oil and bring to medium-high heat. Once the bacon is thoroughly browned, remove it from the pot and place it on a plate covered with paper towels to absorb the excess fat. Add the carrot and onion to the pot and allow them to cook in the oil and bacon fat until tender.

Preheat the oven to 450 degrees. Add the beef and cooked bacon to the pot with the vegetables. Add the salt, pepper, and flour, and stir the meat and vegetables until they are thoroughly coated. Place the pot in the oven and allow the meat and vegetables to cook for four minutes or until the beef begins to brown. Stir the ingredients again, and return the pot to the oven for four more minutes, or until the meat is browned.

Lower the oven temperature to 325 degrees. Return the pot to the stove, and add the wine, stock or broth, tomato paste, garlic, and herbs. Bring to a simmer and then return the pot, covered, to the oven. Allow the stew to simmer for 2-3 hours or until the beef is fork-tender. You may want to uncover it at some point during the cooking process to allow the liquid to reduce a bit.

Add the mushrooms and braised pearl onions to the pot, and allow the stew to cook for at least five more minutes. Once the mushrooms are cooked, remove the pot from the oven and skim the fat off the top of the stew with a spoon. Serve the stew over a bed of warm, buttered egg noodles.


Braised Pearl Onions
(You can omit these if you want, but they are part of Julia’s original recipe, and I adore them!)

12 oz. package of frozen pearl onions
3 tbs. butter
½ cup of beef stock/broth or red/white wine*
¼ tsp. dried thyme

*The choice of braising liquid is entirely up to you. If you want the onions to have a meaty flavor, then go with the beef stock or broth. The wine, on the other hand, will impart a lighter, sweeter flavor.

On medium-high heat, melt the butter in an oven-safe skillet and add the onions. Allow them to cook, stirring them occasionally, until they begin to brown. Add the liquid and thyme, and place the skillet in a 325 degree oven. Allow the onions to cook for around 15-20 minutes or until the onions are browned and the braising liquid has been absorbed. 


(God Bless Julia Child.)
Bon appetit!


Thursday, September 13, 2012

Bourbon Sweet Potato Tart

I had sweet potatoes -- they were on sale. I had top-shelf bourbon -- I had gotten it at a 50% off discount. So what would be the next logical step? Dessert, of course. 

Sweet potato pie was a staple in my household growing up. My mom made them constantly, and they were always incredible. Another reason I adore sweet potato pie is because it's a relatively inexpensive dessert (using only sweet potatoes, sugar, pie crust, eggs, sometimes milk), it's virtually fail-proof, and it's always a crowd-pleaser. 

I mentioned this a few entries ago, but I love adding bourbon to desserts. Its natural sweetness complements the flavor of most sweet treats, and it gives a subtle kick that enhances the overall taste. You've probably seen recipes for Bourbon Pecan Pie before, but the flavor of bourbon pairs surprisingly well with sweet potato!

A few Christmases ago, I received a tart pan as a gift -- and I've used the hell out of it. I really enjoy tart pans because they're great for "dressing up" an ordinary pie or pie-like edible. I've used mine to make quiche on several occasions. I just think that tarts are so elegant and sophisticated-looking. Also, seriously, how impressed will your friends be if you tell them you made a "tart"? Nobody makes those anymore!

Now, if you don't have a tart pan, you can just use a regular pie pan. Don't sweat it. 


Bourbon Sweet Potato Tart

1 large sweet potato (or 2 small ones) 
1 refrigerated pie crust*
3/4 cup sugar
2 eggs
1-2 tbs. bourbon*

*As I said in my last entry, if you like to make your crust from scratch, go right ahead, and kudos to you! I, on the other hand, prefer the quick and easy route when it comes to pastries.

*You can add bourbon to taste. A healthy tablespoon will do ya, but two will do ya even better. If you'd rather exclude this ingredient, a teaspoon of vanilla or a tablespoon of maple syrup would be worthwhile substitutes. 

Preheat oven to 350 degrees. Place your sweet potato, whole and unpeeled, on a baking sheet, and allow it to roast in the oven for 30 minutes or until it becomes soft to the touch -- obviously, please don't test its softness with a bare hand. Remove from the oven, allow it to cool, and peel away the skin. Reserve.

Keep your oven temperature at 350 degrees. Roll out the refrigerated pie crust and gently place it in the tart pan, pressing it into place. Remove the excess crust and discard. 

In a mixing bowl, combine the sweet potato, sugar, eggs, and bourbon, and mix until all ingredients are blended thoroughly. If you find yourself with "stringy bits" from the sweet potato, try pureeing the mixture (in a blender or with a hand-blender). Once the mixture reaches an even consistency, pour it into the prepared tart shell/pie crust and bake for 30-40 minutes, or until the mixture is set and crust becomes golden brown.

Remove from the oven and allow it to cool for at least 30 minutes. Serve. 

(As the Brits would say, "That's one lusty tart!" Only in their case, they're probably not talking about pastries.)
 
Enjoy!


Monday, September 10, 2012

Pastry-Wrapped Salmon with Herbes de Provence

Salmon is probably my favorite fish. I just love its texture and unique flavor profile. I even love it raw. Seriously, give me some smoked salmon and cream cheese on a bagel with capers and thinly-sliced tomatoes and onions, and I'm in heaven. 

With that in mind, this recipe is one of my absolute favorites. I concocted it one evening a while back when I was feeling rather experimental. Salmon + Pastry? That's a perfect duo in my book. Needless to say, it was an instant winner.

Another great aspect of this dish is that it looks and sounds very complicated, but it's actually incredibly easy to throw together, even for culinary amateurs. If you ever want to impress your guests at a dinner party, this recipe is the way to go. 

I used to call this recipe "Salmon Provencal" because of the inclusion of Herbes de Provence until I realized that there is an actual dish called "Salmon Provencal" that is completely different from my concoction. I have been known to refer to this dish as "Fishy Puff" on occasion, but "Pastry-Wrapped Salmon with Herbes de Provence" sounds so much more sophisticated and cosmopolitan, doesn't it? 


Pastry-Wrapped Salmon with Herbes de Provence

1 skinless salmon filet* (Somewhere between .7 lb-1 lb) 
1 store-bought refrigerated pie crust*
1/2 cup olive-oil based mayonnaise*
1 tbs. dijon mustard
1 tsp. Herbes de Provence
1/4 tsp. garlic powder
1/4 tsp. salt
1/4 tsp. pepper

*If your salmon filet still has the skin in tact, make sure to remove it. Usually, it peels off somewhat easily. 

*I originally made this recipe using puff pastry, but regular old pie crust is just as delicious. However, both puff pastry and phyllo dough are excellent with this recipe. If you are a pastry whiz and want to make your own dough, go for it. I, on the other hand, hate making pie dough, so the store-bought variety suits me just fine. 

*You can use whatever kind of mayonnaise you like, but I promise, this is so much better with the olive-oil based variety. If you don't like mayo, just double up on the dijon mustard. 

Preheat oven to 350 degrees. Prepare a well-greased baking sheet. 

In a bowl, combine the mayonnaise, mustard, and seasonings thoroughly until they are mixed evenly. 

Unroll the pie crust and place your salmon filet to one side of it. Then spread the mayo-mustard mixture evenly over the fish, forming an even layer. If you have excess (which is likely, just discard it). Then wrap the fish in the pie crust and seal the edges. Place it on the baking sheet and brush the crust with a bit of melted butter for a browner, prettier crust. 

Bake for 30 minutes or until the crust is golden brown. Allow the fish to cool for 5-10 minutes and then serve. 

(Pastry-wrapped love.)

 As far as side dishes go, this pairs well with a light salad or roasted vegetables. Also, don't forget the wine! Enjoy! 


Saturday, September 8, 2012

Impromptu Late-Night Post: The Best Dang Chicken Fingers Ever

I wasn't planning on composing a new blog entry tonight, but I flung a craving for chicken fingers earlier and decided to indulge myself. 

I won't wax poetic on the virtues of homemade chicken fingers as opposed to the fast food variety, but in all honesty, the homemade version is ultimately victorious in any sort of comparison. 

This recipe was inspired by Hilah Johnson whose cooking blog and videos are a never-ending source of amusement and inspiration for me. I took her recipe for a fried chicken sandwich and metamorphosed it into my own recipe for chicken fingers. Regardless of whichever one you try, both recipes are definite winners! 


The Best Dang Chicken Fingers Ever 

2 boneless, skinless chicken breasts
1 cup dill pickle juice*
1 egg
1 tsp. hot sauce
1 1/2 cups all-purpose flour
1 tsp. celery salt
1 tsp. basil
1 tsp. black pepper
Canola oil 

*Sounds weird, right? I know. But trust me, the pickle juice serves as an excellent "quick brine."

Cut the chicken breasts into strips. Marinate them in the pickle juice for at least 30 minutes. 

In a bowl, beat the egg and hot sauce together until evenly mixed. In a different bowl, combine the flour and seasonings.

In a heavy-bottomed pot or skillet, heat the canola oil (around 2 cups or so) to medium high heat. Remove the chicken strips from the pickle juice and coat them in the egg wash. Then coat them evenly in the flour mixture. Place the breaded strips, a few at a time, into the heated oil. After 2 or 3 minutes, flip the strips and allow them to fry for 2 or 3 more minutes. Continue this process until they are evenly browned on both sides. Once they are browned, remove the strips from the oil and place them on a plate with paper towels to absorb the excess grease.

Allow them to cool for at least 5 minutes and serve. 

(You won't even need a dippin' sauce! However, if you want one, I'd recommend a lovely homemade sriracha-mayonnaise or honey dijon.)

Enjoy the crispy, juicy, delicious wonder! 


Friday, August 31, 2012

The Country Trifecta: Fried Catfish, Crispy Homemade Fries, and Blackberry Cobbler

First, let me begin by deeply apologizing for my unintended hiatus. I haven't had the opportunity to update the blog in a while, as I've been caught in the "back to school" rush of a new semester. So I decided to make it up to you with a huge blog post with three calorie-laden recipes: Fried Catfish, Crispy Homemade Fries, and Blackberry Cobbler.

Fried catfish is a particularly favorite dish of mine. Growing up, it was a treat that we feasted upon only on special occasions. Admittedly, I prefer ordering fried fish of any kind at restaurants as opposed to making it at home, mainly because I hate the resulting mess from frying, but I think my homemade fish is pretty good, if I do say so myself. 

And what pairs better with fried catfish than french fries? And yet, it's another dish that is more desirable when purchased as opposed to being prepared at home, as the homemade variety tends to be soggy and floppy. However, I recently discovered the secret to homemade fries that are ACTUALLY crispy! It's a bit of a tedious process with the soaking and double-frying, but it truly does work.


Fried Catfish

Whole catfish*
Cornmeal mix* 
Salt & Pepper
Canola Oil 

*I ALWAYS prefer whole fish to filets. I find the overall flavor and texture to be much better when the fish is still on the bone. 

*You can use plain old straight-up cornmeal if you prefer, but I prefer the texture resulting from using the cornmeal "mix." 

Season the fish generously with salt and pepper. Give the fish a generous coating of cornmeal mix. I recommend re-coating the fish two or three times, just to ensure a hearty crust. 

Heat the canola oil in a heavy-bottomed frying pan until it reaches a medium-high heat. You can test the oil by dropping in a few cornmeal crumbs -- if the crumbs start to sizzle, the oil will be hot enough. Gently place the fish in the pan. If you are cooking several fish, I don't recommend cooking more than two fish at once, as the overcrowding will affect the temperature of the oil. 

Fry the fish for five minutes (ha! alliteration!) and then turn it, and cook for five more minutes. Continue this process until the fish has become a golden brown color. Place the fish on a plate with paper towels to absorb the excess grease. Cool for five minutes, and enjoy! 


Crispy Homemade Fries 

Russet potatoes
Salt 
Canola oil

Peel the potatoes and slice as desired. Place the potato cuts into a large bowl and fill with ice water. Allow them to sit for half an hour, then remove them from the water and place them on paper towels to dry. 

Heat the oil in a heavy-bottomed pot until it reaches a medium-high heat. Once the potato cuts are dry, add them to the heated oil a few at a time. Don't overcrowd the pot, as this will affect the temperature of the oil. Once the fries have reached a light golden color, remove them from the oil and place them on a plate with paper towels to absorb the excess grease. Remove the pot from the heat. 

Allow the fries to cool for five minutes, and then re-heat the oil, once again to a medium-high heat. Return the fries to the pot and cook them until they turn a light golden brown color. Remove them from the oil and place them on another plate with paper towels. Sprinkle with salt, and enjoy! 

(Southern-fried goodness -- served with ketchup, the Alabama way!)


When it comes to cobbler, there are many different varieties. The cobbler with which I grew up has more of a rich, cake-y topping as opposed to a crust (and I believe this concoction is occasionally referred to as a "buckle"). However, when I make cobbler, I tend to go for the more traditional crust -- mainly because I can never remember the flour-sugar ratio for my mom's "crust." 
My recipe may seem a bit odd, considering I add jelly to the berries. However, I promise you, the results are AMAZING. I discovered this concoction purely on accident a few years ago. I wanted to make a blackberry cobbler, and I wondered how it would taste if I incorporated some of my homemade raspberry jam. So I added the jam to the berries in lieu of sugar, and I discovered that the jam contained just enough sugar to sweeten the berries, and the flavor for the jam melded beautifully with the berries' tartness. Also, the pectin from the jelly or jam helps to thicken the filling, making for a rich and delicious cobbler. 


Tyler's Blackberry Cobbler
1 lb. blackberries, fresh or frozen
1 half-pint jar of jam/jelly/preserves*
*I've found that jam, jelly, and preserves all work well for this recipe, so use whatever is most convenient. Berry-flavored varieties obviously pair well with the blackberries, but you'd be surprised at some unusual-sounding combinations that are quite delicious. Once, in a pinch, I used apricot preserves. Also, for this particular cobbler, I used a jar of homemade vanilla pear jelly, and the results were outstanding!

Crust:
3 cups all-purpose flour
1 1/2 sticks cold butter
1 tsp. salt
1 tbs. sugar
Ice water

You'll want to prepare the crust first. In a food processor, add the flour and the butter. Blend together until the butter has fragmented into tiny pieces throughout the flour. Add the salt and sugar. Gradually add ice water, a few tablespoons at a time, and blend until the mixture becomes a workable dough. Remove the dough from the processor and mold into a disk. Wrap the dough in plastic wrap and refrigerate until thoroughly chilled. 

In a medium-sized saucepan, heat the blackberries and jelly on medium-high heat until the mixture reaches a simmer. Remove the dough from the refrigerator. 

Here's where I will digress for a moment. I'm one of those weirdos who likes dumplings in my cobbler. So what I do at this point in the cooking process is pinch a few pieces from the dough and add it to the simmering berries. 

Preheat the oven to 350 degrees. Roll the dough out until it's around 1/8"-1/4" thick. Cut to fit your oven-safe baking vessel -- you will likely have excess dough. Then, add the berry mixture to the vessel and top with the cut dough. For a pretty brown crust, you will want to pour a bit of melted butter over the top. Bake for around 45 minutes to an hour, or until the crust is golden brown. Allow to cool, and enjoy! 
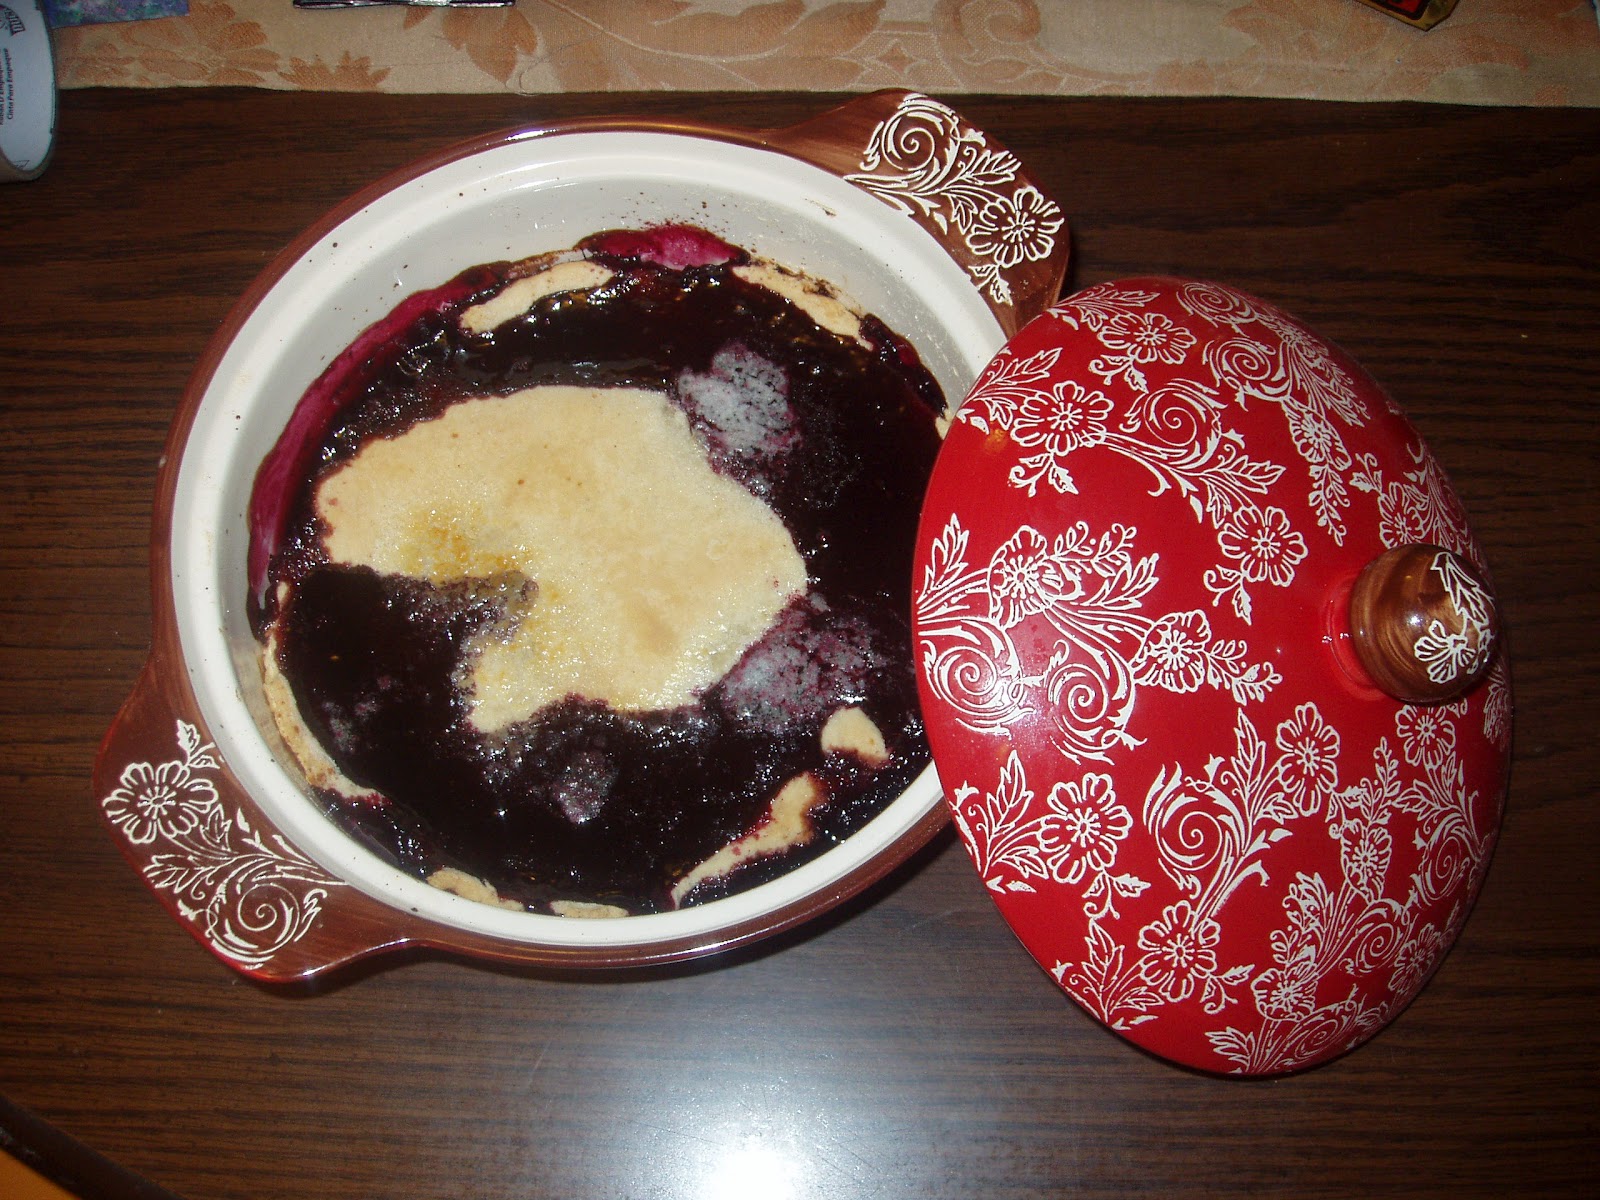
(Ta-dah! Enough to share -- but you won't want to...)

Enjoy, guys! 
 

Thursday, August 9, 2012

Slow-Cooker Pear Butter

When I was about 4 or 5, we planted a pear tree in the little orchard beside my house. Over the years, the tree has grown into a magnificent spectacle of arboreal life. While most of the trees in our orchard have sadly withered and died, the pear tree remains strong and vibrant, producing a lush abundance of fruit every summer. 

A few summers ago, I decided to explore the art of canning, and our annual bumper pear crop was going to be one of my test subjects. I honestly can't even remember how many jars of jellies and jams I made over those few months -- pear jelly, vanilla pear jelly, pear jam, pear and cherry jam, and on, and on. All I know is that I had enough jars of pear-y confections to provide everyone I know with a homemade Christmas gift and still have enough left over to satiate myself for the next year. 

Therefore, with our yearly plentiful pear crop, I've begun to experiment with a variety of pear-oriented recipes. I once made a pear and ginger cheesecake that was remarkably delicious. On a separate occasion, I attempted a pear cream pie, which was nothing short of a complete culinary disaster -- however, at the last minute, I decided to pull a Tim Gunn and "made it work," but with an indecent amount of gelatin and gratuitous swearing. 

My favorite recipe, however, has to be pear butter, for a multitude of reasons. First and foremost, who doesn't love fruit butters? Everyone loves apple butter! Speaking of which, I swear that the Flying Biscuit in Atlanta must put crack in their cranberry apple butter, because it's beyond addictive. Anyhow, I digress. Another concoction I created during the summer of endless canning was a peach butter that was insanely good. So, long story short, it would probably be immensely difficult to create a fruit butter that doesn't inspire salivation. 

On that last point, another reason I appreciate my pear butter recipe is that creating fruit butters is ridiculously easy. As much as I love jelly, I have to admit, it is a pain in the nether regions to make. If you don't nail the recipe with 100% precision, you will either end up with Jell-O or a runny mess. While making a jam is significantly easier, making a fruit butter is even simpler still, as you don't have to worry about pectin or specific cooking times, and all that jazz. As a matter of fact, I make all my fruit butters in a crock-pot. All you need do is peel and slice your fruit, add sugar and whatever other ingredients you like, and let it roll. Done deal. Seriously, it's completely idiot-proof. 

Now, while I will gladly share with you my recipe for pear butter, if you want to learn how to properly can your finished product, I encourage you to go elsewhere for guidance. I learned my canning techniques from the old school master (a.k.a. my mom), but whenever I've attempted canning, it's been a matter of trial and error. So because I'd rather you not give your friends and family tiny jars of botulism for Christmas, I will recommend any one of the plethora of websites devoted to this culinary art as a research source. 

For this recipe, you will need a standard 5 to 6 quart slow-cooker. Also, in regards to the type of pears to use, I say just use whatever the hell variety you want. Our pear tree produces a variety known as "sand pears" (also frequently called "Asian pears"), so that's what I use. But for the sake of being economic, I encourage you to use whatever is least expensive and more readily available. 

Slow-Cooker Pear Butter

About 5 lbs. peeled and sliced pears*
2 cups sugar
1 1/2 tbs. cinnamon
1/4 tsp. nutmeg 
1 tbs. lemon juice
2 tbs. Amaretto liquer*
Other spices if desired*

*If you don't have a food scale to weigh the sliced pears, I've found that once your pear slices almost completely fill the crock (leaving about an inch or half-inch of space from the top), then you're good to go.
*The Amaretto is purely optional, but I promise you, it adds a whole new dimension of flavor to the finished product. 
*Many people like to include additional spices such as cloves to their fruit butters. If you are one of those people, by all means, indulge! However, I often find such spices overwhelming, so I tend to exclude them from recipes. 

Add all ingredients to the crock and stir, so that the pears are thoroughly coated with sugar, spices, and liquid ingredients. Set the slow-cooker to high, and cook uncovered for roughly 12 hours, or until the mixture is dark brown and has reached a smooth consistency. Make sure to stir the mixture every few hours or so.

I, personally, alternate between leaving the crock-pot covered and uncovered throughout the cooking period. If I'm leaving my apartment for a while or letting the butter cook while I'm asleep, I tend to leave it covered, but otherwise, I leave it uncovered. Also, if the butter isn't reaching your desired consistency, use a potato-masher or similar implement to make it a bit more smooth. 

The finished product yields 4 half-pint jars. You can consume immediately (after a reasonable cooling period, of course), or you may can the finished product however you so choose. 

One of the added benefits to making this recipe is that your home will smell incredible for a couple of days. My roommate even commented, "It smells like a Yankee Candle store in here." -- I chose to take that remark as a complement. 

And here you have the finished product:

 (They may not be the prettiest pears in the world, but they make for some damn good pear butter!)

Enjoy!